先人の知恵を借りるべく、ググッたりして調べましたが、なかなかできずに試行錯誤した結果、なんとかmigrateができたんでメモしておきます。

作業環境

  • Node.js v0.10.26
  • PostgreSQL
  • Sequelize [CLI: v0.2.4, ORM: v1.7.9]

もろもろインストール

Node.jsはインストールしている前提に話を進めますね。

PostgreSQLをインストール

自分はbrewで入れました。

command
1
$ brew install postgresql

パスを通しておきます

command
1
export PGDATA=/usr/local/var/postgres

node-postgresをインストール

アプリとグローバル両方インストールします。ちなみにnpm install は npm i で略せます(^ ^)

command
1
2
$ npm install pg -S
$ npm i pg -g

sequelizeをインストール

command
1
$ npm i sequelize -S

sequelize-cliをインストール

command
1
$ npm i sequelize-cli -g

sequelize-cliのインストールで、自分は「npm ERR! error rolling back」とかでコケたりしました。npm update -g を実行して、npm uninstall -g generator-karma をしたら、インストール出来ました。

sequelize-cliが使えるか確認

helpが出てきたらインストール成功してます。

command
1
2
3
4
5
6
7
8
9
10
11
12
13
14
15
16
17
18
19
20
21
22
23
24
25
26
27
28
29
30
31
32
33
34
35
$ sequelize
 
Sequelize [CLI: v0.2.4, ORM: v1.7.9]
[18:47:20] Using sequelizefile ~/.nodebrew/node/v0.10.26/lib/node_modules/sequelize-cli/sequelizefile.js
[18:47:20] Starting 'help'...
 
Usage
  sequelize [task]
 
Available tasks
  db:migrate        Run pending migrations.
  db:migrate:undo   Revert the last migration run.
  help              Display this help text. Aliases: h
  init              Initializes the project.
  init:config       Initializes the configuration.
  init:migrations   Initializes the migrations.
  init:models       Initializes the models.
  migration:create  Generates a new migration file. Aliases: migration:generate
  model:create      Generates a model and its migration. Aliases: model:generate
  version           Prints the version number. Aliases: v
 
Available manuals
  help:db:migrate        The documentation for 'sequelize db:migrate'.
  help:db:migrate:undo   The documentation for 'sequelize db:migrate:undo'.
  help:init              The documentation for 'sequelize init'.
  help:init:config       The documentation for 'sequelize init:config'.
  help:init:migrations   The documentation for 'sequelize init:migrations'.
  help:init:models       The documentation for 'sequelize init:models'.
  help:migration:create  The documentation for 'sequelize migration:create'.
  help:model:create      The documentation for 'sequelize model:create'.
  help:version           The documentation for 'sequelize version'.
 
[18:47:20] Finished 'help' after 1.17 ms
[18:47:20] Starting 'default'...
[18:47:20] Finished 'default' after 5.17 μs

migrationを実行する為の準備

config.jsonファイルと、migrationsディレクトリの中にmigrateファイルが必要なので、早速作っていきましょう。作業ディレクトリに移動して、下記のコマンドを実行

command
1
$ sequelize init:config

すると、configディレクトリの中に、config.json が生成されます。中身を見てみましょう

config.json
1
2
3
4
5
6
7
8
9
10
11
12
13
14
15
16
17
18
19
20
21
22
23
{
  "development": {
    "username": "root",
    "password": null,
    "database": "database_development",
    "host": "127.0.0.1",
    "dialect": "mysql"
  },
  "test": {
    "username": "root",
    "password": null,
    "database": "database_test",
    "host": "127.0.0.1",
    "dialect": "mysql"
  },
  "production": {
    "username": "root",
    "password": null,
    "database": "database_production",
    "host": "127.0.0.1",
    "dialect": "mysql"
  }
}

それぞれの環境にあったDBの設定を書いていきます。今回は、PostgreSQLなんで、dialectのところは、「postgres」としてくださいね。

config.json
1
2
3
4
5
6
7
8
9
10
11
12
13
14
15
16
17
18
19
20
21
22
23
24
25
26
{
  "development": {
    "username": "root",
    "password": null,
    "database": "database_development",
    "host": "127.0.0.1",
-   "dialect": "mysql"
+   "dialect": "postgres"
  },
  "test": {
    "username": "root",
    "password": null,
    "database": "database_test",
    "host": "127.0.0.1",
-   "dialect": "mysql"
+   "dialect": "postgres"
  },
  "production": {
    "username": "root",
    "password": null,
    "database": "database_production",
    "host": "127.0.0.1",
-   "dialect": "mysql"
+   "dialect": "postgres"
  }
}

migrationファイルを作ります。

コマンド1つでmigrationファイルのひな形を作ってくれます。

command
1
2
3
4
5
6
7
8
9
10
11
$ sequelize migration:create
 
Sequelize [CLI: v0.2.4, ORM: v1.7.9]
 
Loaded configuration file "config/config.json".
Using environment "development".
[18:58:30] Using sequelizefile ~/.nodebrew/node/v0.10.26/lib/node_modules/sequelize-cli/sequelizefile.js
[18:58:30] Starting 'migration:create'...
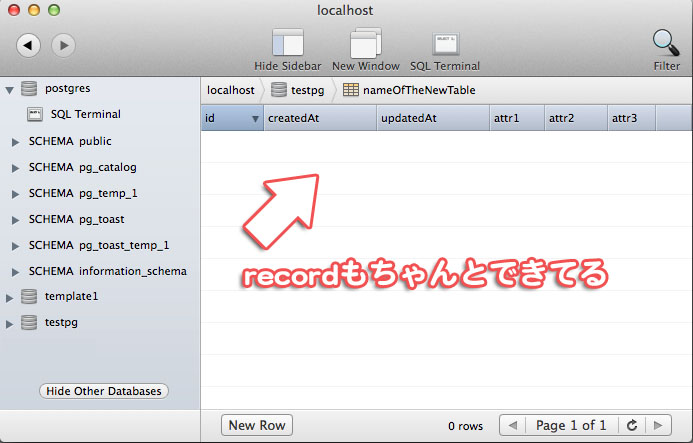
Successfully created migrations folder at "/Users/app/migrations".
New migration was created at /Users/app/migrations/YYYYMMDDHHMMSS-unnamed-migration.js .
[18:58:30] Finished 'migration:create' after 1.7 ms

migraionsディレクトリができて、その中にコマンドを実行した年月日時間がファイル名についてるファイルができます。 ちなみにcoffeeファイルを作ることもできます。

command
1
$ sequelize migration:create --coffee

migrateを実行

Sequelizeの公式サイトに記載されているmigrationファイルを参考にします。

YYYYMMDDHHMMSS-unnamed-migration.js
1
2
3
4
5
6
7
8
9
10
11
12
13
14
15
16
17
18
19
20
21
22
23
24
25
26
27
migration.createTable(
  'nameOfTheNewTable',
  {
    id: {
      type: DataTypes.INTEGER,
      primaryKey: true,
      autoIncrement: true
    },
    createdAt: {
      type: DataTypes.DATE
    },
    updatedAt: {
      type: DataTypes.DATE
    },
    attr1: DataTypes.STRING,
    attr2: DataTypes.INTEGER,
    attr3: {
      type: DataTypes.BOOLEAN,
      defaultValue: false,
      allowNull: false
    }
  },
  {
    engine: 'MYISAM', // default: 'InnoDB'
    charset: 'latin1' // default: null
  }
)

migrationの内容を保存したら、下記のコマンドでmigrationを実行します。

command
1
$ sequelize db:migrate

で、coffeeファイルの場合は、optionをつけると実行できます。

command
1
$ sequelize db:migrate --coffee

migrationが成功したら、DBを確認してみましょう。自分は、PC Commander というGUIツールを使っています。

20140820_01 20140820_02

まだ試していませんが、Herokuにdeployする時にmigrationが実行される、Gruntfileでも作ってみようかと思います。今回は、開発環境にてSequelizeでPostgraSQLをmigrateする方法の紹介でした。ほいではまた!